Sony UTX-B2K42 wireless lapel microphone user guide
The Sony UTX-B2K42 wireless lapel microphone can be used in certain non-central UQ teaching spaces.
Most central lecture theatres provide Shure wireless microphones at the lectern. If a teaching space has Shure wireless microphones or a CRESTRON touch panel at the lectern, you will not be able to use Sony wireless microphones in this space.
Microphone controls
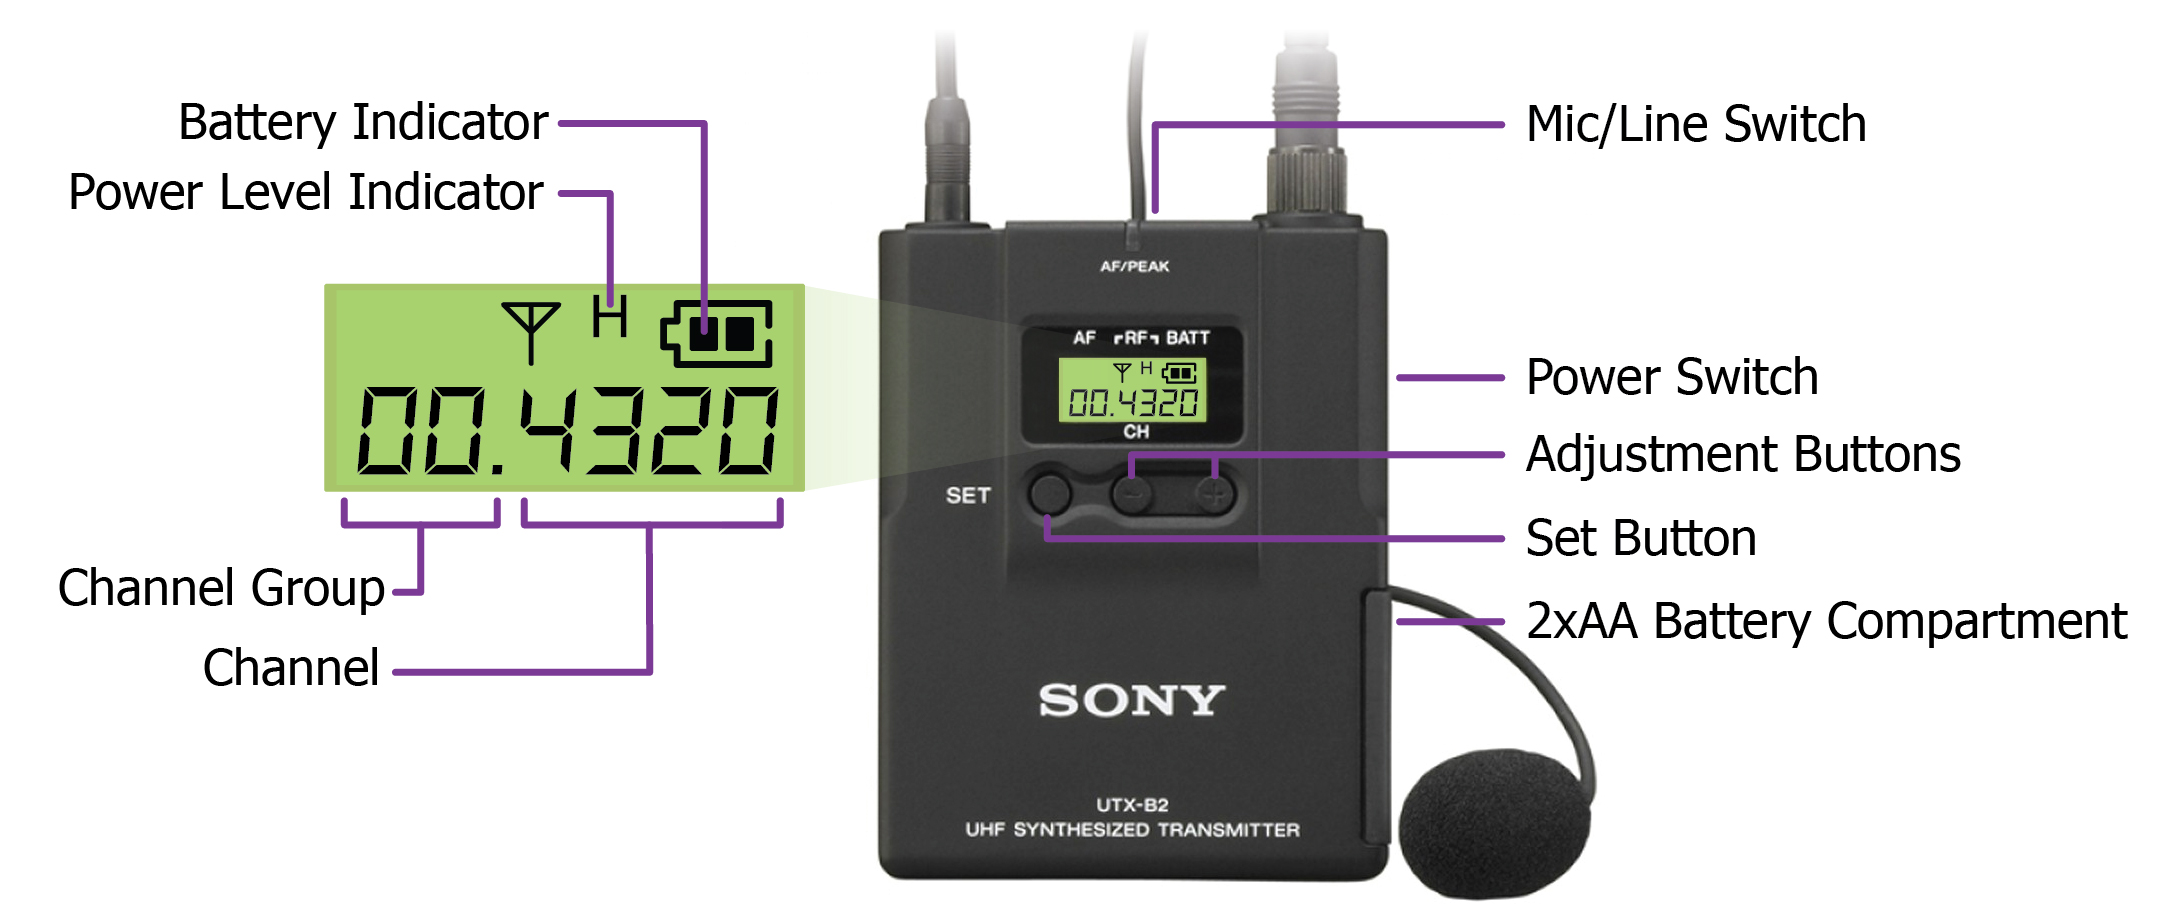
Battery indicator | This shows the current charge on the microphone’s batteries. |
Power level indicator | This shows the current radio frequency power level. It can be toggled between H (high) and L (low). It should be on H. |
Channel group | This shows the current channel group. At UQ, this should always be set at 00. |
Channel | This shows the current channel the microphone is transmitting to. |
Mic/Line switch | This changes input gain between microphone and line level. It should always be set to MIC. |
Power switch | This turns the microphone ON and OFF. |
Adjustment buttons | These buttons toggle through menu settings. |
SET button | This changes and enters menu settings. |
2xAA battery compartment | The microphone takes two AA batteries. To change them, squeeze the two clips to unlock and remove the battery compartment. |
Instructions for non-central lecture theatres with an AMX touch panel AV control system
If the lecture theatre has Shure wireless microphones or a CRESTRON touch panel at the lectern, you will not be able to use Sony wireless microphones in this space.
To use the UTX-B2K42 microphone in a non-central lecture theatre:
- Use the power switch to turn the device OFF.
- Make sure that the Mic/Line switch is set to MIC.
- Press and hold SET, then turn the microphone ON.
- Once you see characters flashing on the microphone’s display, release SET.
- Keep pressing SET until you see 'PO:H' or 'PO:L' flashing on the display. This is the power level setting.
- Use the adjustment buttons to change the power level to H, then press SET.

- You should see a series of numbers on the display, separated by a dot or a space. The first set of numbers should be flashing. This shows the channel the microphone is transmitting to.
- Use the adjustment buttons to set the first two numbers (the channel group) to 00, then press SET.
- Use the adjustment buttons again to set the room’s channel, then press SET.

The channel for the UQ lecture theatre should be displayed on a red volume fader on the audiovisual touch-panel display, and also on a sticker above the touch panel. See Radio microphone channels for a list of UQ teaching rooms and wireless microphone channels.
- Press SET twice. You should see ‘ATT - 00’ on the screen, followed by a flashing two-digit number.
- Use the adjustment buttons to set this number to 00, then press SET.
- Turn the microphone OFF then ON again. The microphone will then turn on with the correct settings.
- Turn on the room’s audiovisual system, then use the red 'RADIO MIC' volume fader to mute or adjust the microphone’s volume level.
